How to sell your pre-loved GPU (or other PC parts) on eBay Australia
Make the most of the seller’s market with this easy guide to reselling PC components
With 2021's peak gaming season officially upon us, the time to upgrade could not be riper. A key leftover from the process of swapping out your current graphics card, CPU or RAM is your old (but usually still good!) pieces of hardware. In the midst of a chip and component shortage, these prime pieces of kit should never go to waste, and could even fetch you a tidy sum on the second-hand market. If you have a working piece of hardware, it’s usually well worth the effort to sell it.
Helping you skip past the minefield that hardware forums can be, eBay is one of the easiest and most reliable ways to pass these pre-loved goods onto someone else who will give them all the continued use they deserve. If you’re a first time-seller, never fear; this guide will walk you through, step-by-step, on how to send your pre-loved PC parts to a new home as soon as possible.
You mightn’t even need to leave the house; eBay has partnered with Sendle so you can leave your item at your front door to have it directly picked up and shipped from your home. Don’t have a printer for the label or conn note? That’s no problem either: you can just write the recipient's details directly on the parcel itself.
For new eBay users, creating an eBay account is free and can be done on any browser or on the eBay mobile app. After that, it’s just a matter of heading to the Sell tab (top right on desktop) or Selling tab (bottom right on the app) to create a listing, then posting and monitoring it.
If you're ready to dive in, then head to eBay's Selling homepage to get started, or alternatively check out our step-by-step guide below to see how easy it is to set up a listing!
1. Log in or create a new account
You can log into eBay with a Google, Facebook or Apple account, or create a new account using just an email address.
2. Create a listing
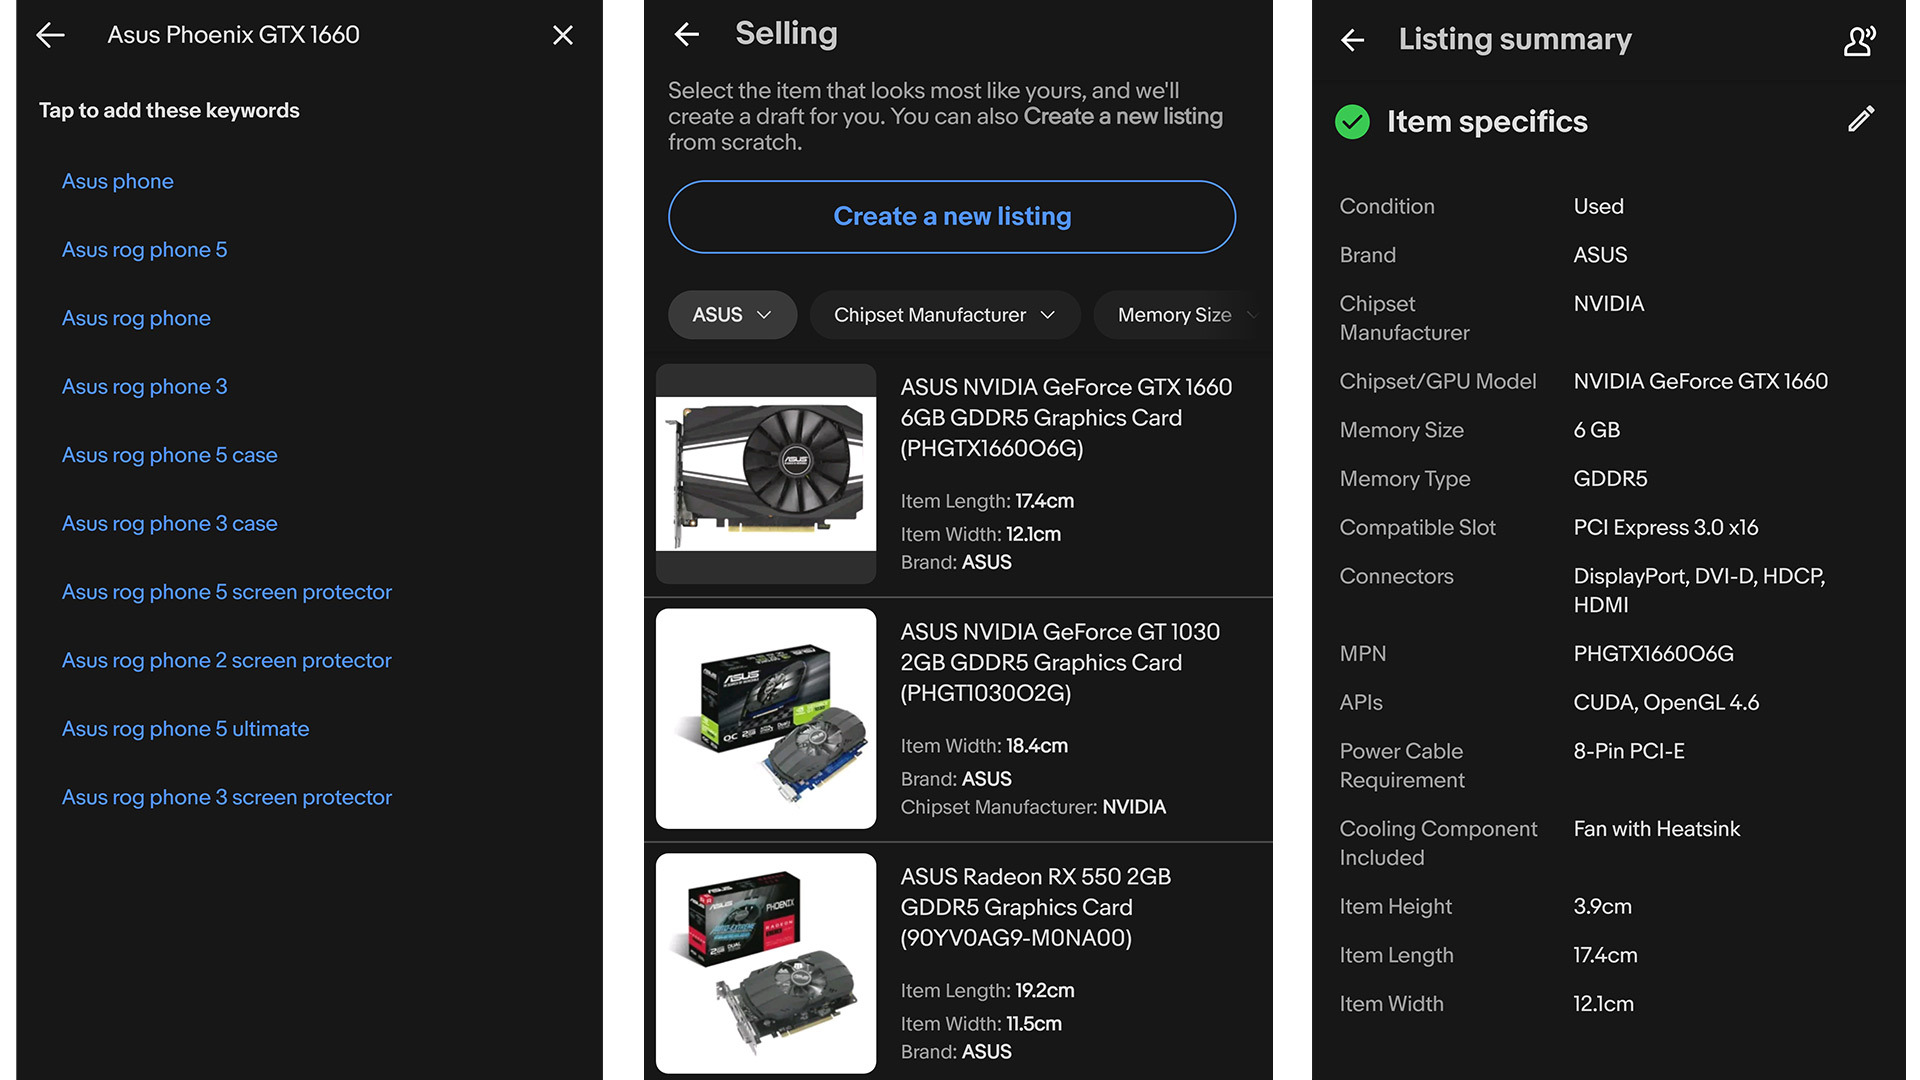
eBay’s desktop and mobile platforms let you start creating a listing straight away. From the homepage, click the ‘Sell’ button on the top toolbar, then select ‘List an item’ and use the provided search box to find the product you want to list for sale.
In the tech world, creating listings from scratch can be a slightly finicky process. When selling a graphics card, for example, you’d need to specify the brand, model, maker, GPU and include the specs of the product. By using the search box, you can find if the product you are selling has been sold before on eBay - and if it has, all these details can often be pre-filled for you.
If you’re using the app, you’ll notice this search box has an additional barcode icon at the far right, which can make creating a listing even simpler. If you have the original box of the item you’re selling, you can tap the barcode icon to scan your item and automatically import its details to your listing, making things super-quick.
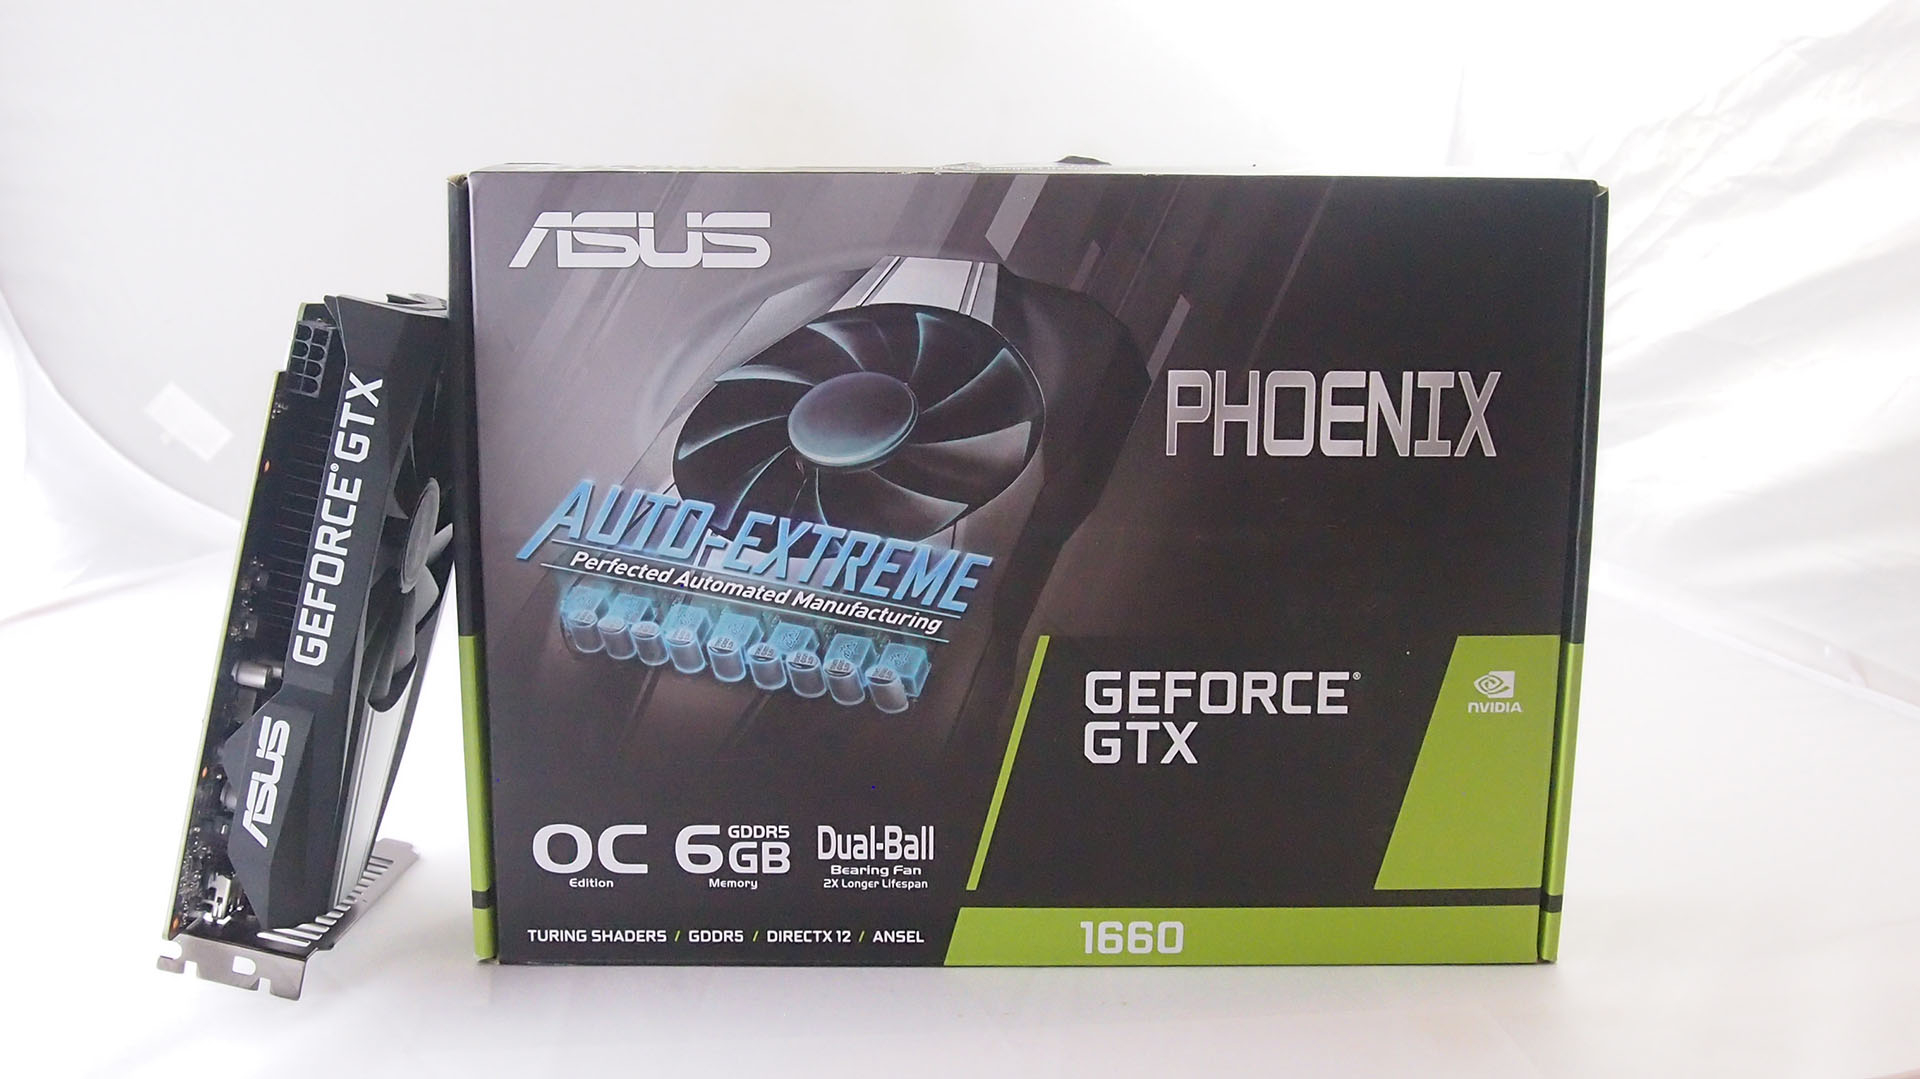
(As a quick side note, if you’re planning on reselling a PC part at some point, holding onto the box is highly recommended. It allows you to ship the component safely, as well as providing a level of comfort to the buyer that you are selling what you are claiming to sell.)
3. Edit your listing
Once you’ve completed the above, first-time sellers will be asked to enter their address and contact number, and you’ll then be taken to your listing summary. Here you can change the title of your listing, add/edit descriptions, pricing and, most importantly, add images.
Pricing options and text to describe your item should already be there, and if you’re listing an item that’s often sold on the site (graphics cards definitely fall under this category) a stock photo will also be included. To set yourself apart from the crowd, it’s always worth adding your own photos to show the condition they are in and reassure buyers that you’re genuine. Be sure to include photos of any potential problem areas – even small scratches – it’s best to be honest and could help avoid painful returns later on from a disappointed buyer.
4. Fixed price or auction?
For particularly in-demand PC components like graphics cards, an auction may well yield a better result. Set the starting price reasonably low – about one-quarter to one-third of the final price you expect is a good starting point. Don’t despair if bids come in slowly – if your item has a lot of views but few bids, you can almost guarantee the action will heat up in the last hour before the auction closes.
If you choose to go down the auction route, note that it will be a minimum wait of at least 1 day before it’s all wrapped up – and you do run the risk of it selling for a price below your expectations, and you will be obliged to honour that price.
Alternatively, setting a ‘Buy It Now’ fixed price can guarantee you’ll get what you’re after (provided buyers agree with you, of course), and you may well wrap things up not long after the item lists. Bear in mind that the set price is removed from the listing as soon as the first auction bid comes in.
As a third option, you can try for the best of both worlds by adding a ‘Best Offer’ option onto your listing to open up negotiations with potential buyers.
5. Add and edit product photos
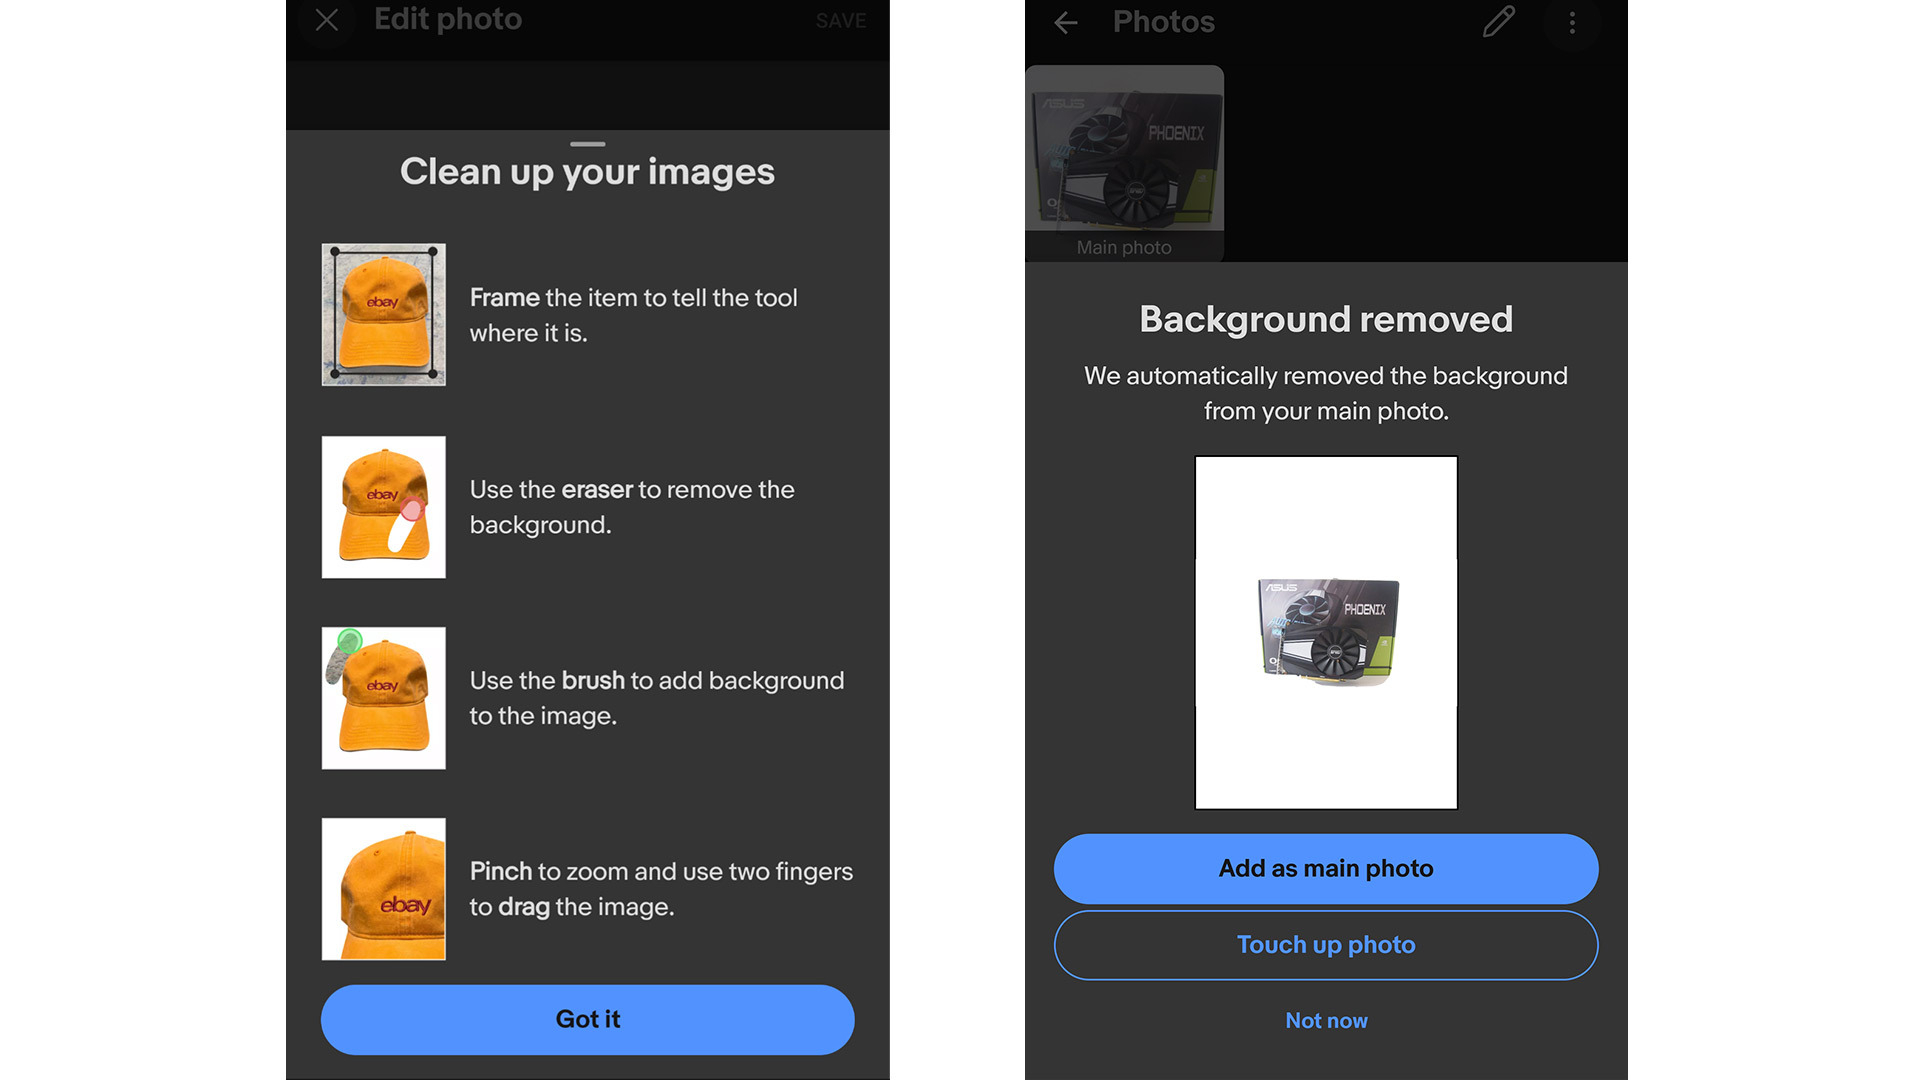
When scrolling through eBay, buyers shop with their eyes, so having good photos of your item should be a high priority. eBay recommends that you provide all product images with a white background to allow the item to stand out. If you don’t have a white background at hand, eBay’s mobile app includes some great tools to help you take clean images regardless.
Photos can be taken in the app itself – just select the pencil icon beside ‘Photos’ in the listing summary. Tap on the plus sign at the bottom of the page to take more snaps, then use the built-in photo editor to remove any unwanted backgrounds. This works best when the product is distinctly different from the background. The photo editor has a series of tools to touch up the image if the background removal needs minor adjustments.
Once done, the images will be automatically saved into the listing summary, and also synced across your devices in case you want to continue finalising your listing on your computer. eBay has some further tips for taking photos here to really help your listings pop.
6. Price your part correctly
Unsure how much your item is worth? eBay can give you a rough indication of how you should price your products too. Depending on whether you want to auction your items or use a set, fixed price, eBay will automatically suggest a number based upon the closing price of similar listings. This is only a suggestion however, and you’ll be able to tweak the price to your satisfaction.
7. Shipping and handling
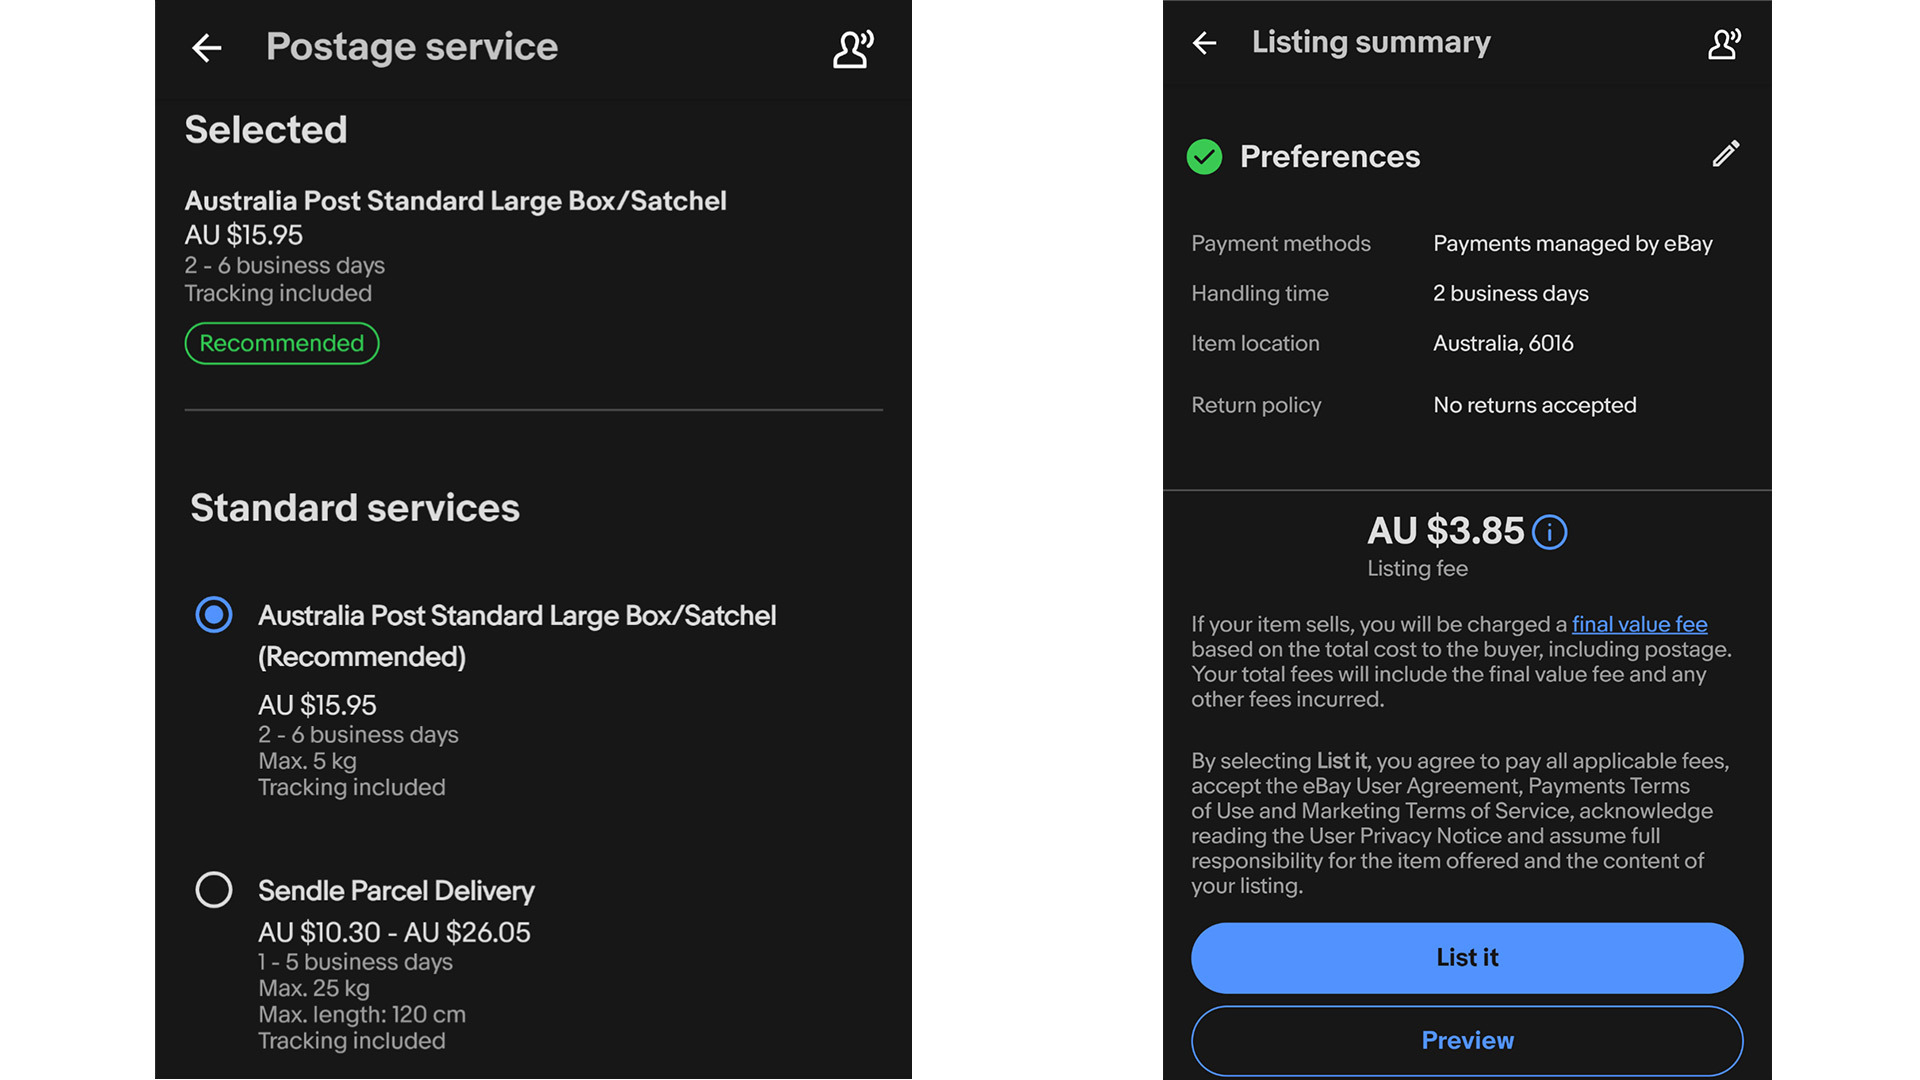
The listing summary is where you dictate how you’ll post your item. Australia Post is selected by default, but you can also choose whether you’d like to ship via Sendle or from a list of the integrated services offered by eBay.
You can then print labels from home – or if you don’t have a printer, select the ‘no printer’ option – package the item and either take it to your nearest post office or have a courier from Sendle pick it up from your door at no extra charge. Courier pick-up from Sendle only costs from AU$6.20 for same state delivery.
8. Preview and post your listing
Once you’ve completed the listing summary, you can preview what your live item will look like on both desktop and mobile, or save it for further editing later. If you’re happy with how the listing looks click ‘List it’ and you’re off!
If you’ve decided to have the item run as an auction instead of a set price, you’ll also want to play the timing to your advantage and schedule the listing to go live at a time that taps into buyer’s patterns. Mid-evening on Friday or Saturday are regarded as the best for having an auction end for consumer products. Try and avoid having an auction end during working hours – you want people sitting at home with time on their hands and ready to increase their bid at a moment’s notice when things are winding up.
9. Monitor your listing
Now we play the waiting game. While your listing is live, eBay will send you emails and app alerts when offers have been made, so be sure to allow notifications on your mobile.
Always answer any questions you get from interested buyer’s promptly, honestly and pleasantly.
When your item sells, the listing will automatically change status and you’ll be notified, after which you just need to package your item up, ship it to the buyer and use the app or site to notify them that it’s on the way.
If you chose to auction your items but they didn’t sell on the first try, they can be relisted within the app or via the browser with the touch of a button.
That’s all there is to it when it comes to selling pre-loved PC hardware on eBay. Easy, right? Sign up or log into your eBay account and get started today.
Keep up to date with the most important stories and the best deals, as picked by the PC Gamer team.
