Where to find every toolbox in The Last of Us Part 1
The Last of Us tools are vital for upgrading weapons.

The Last of Us Part 1 tool locations are easy to miss if you're not paying attention. With so many infected to look out for and with Ellie in tow, it's hardly surprising that you may have trouble spotting them. The toolboxes are vital, though, and will let you upgrade your weapons so you stand more of a chance of making it through your journey.
Speaking of upgrading your weapons, you'll get quite a few parts by locating The Last of Us safe codes and collecting the goodies inside. As for the toolboxes, there are five to find, and they're spread throughout the game. If you're ready to get started, here's every The Last of Us tool location.
The Last of Us Part 1 tool locations
The five toolboxes to find, each in a different section of the game. I'll list the general location of each toolbox below and go into more detail about where to find them in their own sections further down. As you might expect, these tools are bright red but they're quite small so they can be hard to spot in dimly lit areas or if you're being hounded by infected.
Here's every The Last of Us toolbox location:
- Bill's Town: In the church basement
- Pittsburgh: Inside a garage
- The Suburbs: Inside a room in the sewers
- The University: Lecture Room 205
- Bus Depot: Triage tent on the highway
Bill's Town tool location
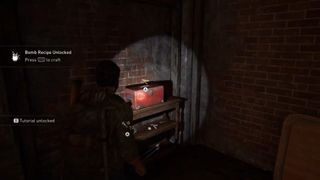
Once you meet Bill, you'll go with him to the basement of the church. You'll know you're in the right place because it's here that you unlock the recipe for the nail bomb by interacting with the object on the table in the middle of the room. In the corner at the back of one of the alcoves here, you'll find the red toolbox sat on some low, wooden shelves.
Pittsburgh tool location
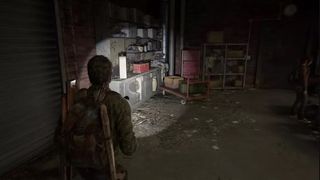
You'll find this toolbox early on in the Pittsburgh chapter. It's located on metal shelving to the left of the door inside a garage after you escape an attack. You'll need Ellie's help to get the heavy sliding door open to access it. You'll also find a safe further on in this chapter, so it's good to have all the help you can get when dealing with the infected in the area.
The Suburbs tool location
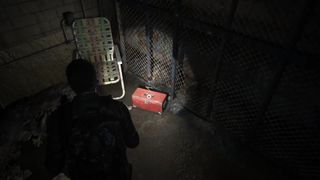
Once you reach the sewer, and you have Ellie use a palette to reach the other side of the water to power a moveable platform, you'll a long winding tunnel with a shallow channel of water running through the center of it. Follow this tunnel around the first bend and look for a door on your left. You'll find the toolbox on the floor inside the room.
The biggest gaming news, reviews and hardware deals
Keep up to date with the most important stories and the best deals, as picked by the PC Gamer team.
The University tool location
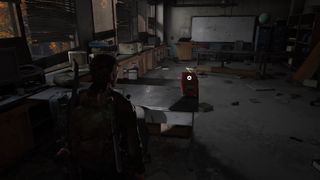
This tool is found quite far into the chapter. Once you reach the science building in the University section and climb through the window to access it, keep left and follow the corridor until you reach the Lecture room, Room 205. Open the door with a shiv and you'll find the toolbox on a bench ahead.
Bus Depot tool location
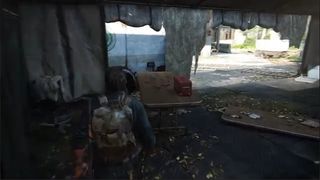
The last toolbox is found inside a triage tent at the Highway Exit section. After you've petted the giraffe, you'll go down some stairs, and Joel will start talking about a previous experience that the area reminds him of when you get to the bottom. Look for the large tent straight ahead, and you'll find the tools on the long wooden table just inside the entrance, to the right.

Sarah started as a freelance writer in 2018, writing for PCGamesN, TechRadar, GamingBible, Red Bull Gaming and more. In 2021, she was offered a full-time position on the PC Gamer team where she takes every possible opportunity to talk about World of Warcraft and Elden Ring. When not writing guides, most of her spare time is spent in Azeroth—though she's quite partial to JRPGs too. One of her fondest hopes is to one day play through the ending of Final Fantasy X without breaking down into a sobbing heap. She probably has more wolves in Valheim than you.
Most Popular


