Win more on Heroes of the Storm's Blackheart's Bay map
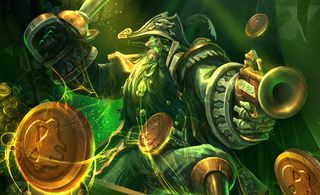
One of the maps that some players dread, Blackheart’s Bay allows for teams to snowball a lead rather easily. Be it in a superior hero composition, better movement between lanes, or simply a good use of the claustrophobic area around Blackheart himself, there are a lot of ways to get an advantage here. Get an early lead, and let Blackheart’s cannons do the work for you.
Blackheart’s Bay revolves around handing in Blackheart coins, which are gained from mercenary camps and chests, in order to convince the ghost pirate to turn his cannons upon enemy structures. Once enough coins are paid—with the amount required going up by two every time you manage to pay Blackheart fully, resulting in diminishing returns for each individual coin—12 cannonballs will start to destroy enemy structures. When you die, though, you drop all the coins you were holding—hoarding lots of coins on one player can be rewarding, but can also ruin your chances if they get caught out.
Picking your hero
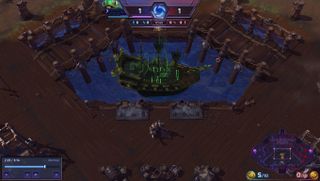
Blackheart’s Bay differs from many other maps in that it’s important to have a hero that can fight the neutral mercenaries and monsters on their own. With 4 groups of mercenaries and monsters, that’s 8 coins ready for the taking, so bring a hero like Illidan, Sonya, or even The Butcher who can leave the lanes in favour of getting the coins. Don’t pick a hero that isn’t supported by the team, though: Illidan, for example, needs a strong support (or two!) to flourish, and will otherwise not be prepared.
Due to the shape of the map, it’s preferable to have a hero who can hold their own in a 1v1 lane, sat down in the bottom lane for as long as possible. Common choices include Zagara, Greymane, or Thrall. While Tassadar is a strong solo laner, it would be preferable to have him grouped with the rest of the team as his strengths lie in shielding teammates.
Early laning
Teams will often race towards the watchtower at the start of each game, offering an opportunity for you to either capitalise on mistakes where an enemy moves too far forward—Stitches will often have an easy time hooking someone—or start a level 1 teamfight. Know your team’s strengths, though, and don’t fight if you’re weaker early. Giving up the watchtower isn’t the end of the game.
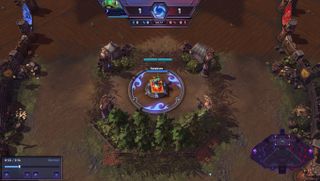
Here, your team of four needs to clear the top lane of enemy minions first. Despite the fact that the middle lane’s minions will meet earlier, clearing out toplane forces the enemy to either give up the chest that will spawn soon after to get the experience, or give up the experience to contest the chest. The chest will spawn at 50 seconds, at which point your team will want to contest it yourselves.
The pirate’s booty
Each chest contains five coins, one released after its first bar of health is brought down, one after its second, and three after the third. One chest spawns just below the middle lane and the other spawns above the bottom lane. The team of four who are towards the top of the map will want to contest and try to capture the top chest, while the solo laners will have to go toe-to-toe on their own.
The biggest gaming news, reviews and hardware deals
Keep up to date with the most important stories and the best deals, as picked by the PC Gamer team.
Against chests, every single hit does one damage. This makes abilities like Li-Ming’s Disintegrate or Magic Missiles useful, as each tick also does one damage.
Don’t focus on getting kills. While they’re helpful, it’s often hard to secure them due to how easy it is to get back behind a gate. Focus on pushing the enemy away for long enough to secure the chest. The experience advantage will come later from superior rotations between the two lanes towards the top of the map and paying Blackheart.
For those fighting one-on-one, there’s one big tip: use the fountain to get an advantage. It’s a free chunk of health that is given over time, so if you’re expecting an extended tussle over the chest, drink up from the fountain first to give yourself an advantage in health and mana. If the enemy doesn’t do this they will have to retreat to their own fountain, giving you time to take the chest for yourself.
Paying Blackheart
Whenever you get a chance to pay Blackheart any number of coins, due to a lull in combat or killing someone on the enemy team, pay him. It’s tempting to hoard three or more and pay them together, but managing to be the first to pay Blackheart will put your team at such an advantage that it’s far more important than looking cool by cashing in a lot of coins.
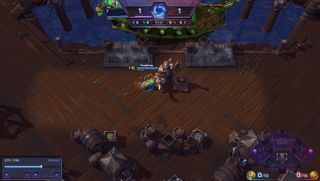
It’s important to check that there isn’t an enemy hiding in the fog just above Blackheart before you turn in—it’s not uncommon for enemies to hide in there just to disrupt you at the last moment as their teammates close in.
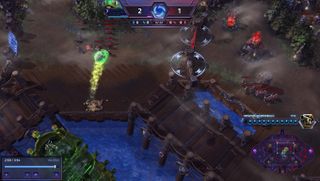
Blackheart’s cannons are strong, but can’t destroy a fort, gate, its turrets and its fountain in one go. If it fires upon the enemy’s structures before they’ve taken any damage, the fort will survive, allowing for an enemy with the M.U.L.E. talent to heal it back up. If possible, try to take one of the turrets beforehand to ensure the fort’s demise.
Continued bombardment
If you’ve managed to get an experience lead, make sure someone keeps taking your camps while you maintain pressure on the chests. Maintain your lead through soaking experience and regularly collecting the coins from the chests and camps of monsters. Blackheart’s Bay lends itself to teams that are ahead, as they can controls chests easily—play it safe by building your advantage and using the cannons to siege.
If you’re behind, however, it’s tough to get back into the game. Using the fog around Blackheart or the underused passages beneath him to ambush enemies is a way to score a kill or two if the enemy are getting cocky.
Most importantly: don’t give up! It’s inevitable that your enemies will make mistakes. It’s never impossible to regain the experience needed to level with your opponents. A strong teamfighting composition should contest chests and the area around Blackheart wherever possible. A composition with sustain and a way to disrupt the coin hand-ins can dance around whittling opponents away. Teams that can single out a lone target should, well, single out a lone target. Teamfights will often occur around Blackheart, especially later on in the game, and picking the right strategy for your composition is a way to flick the switch and possibly make a comeback.
Blackheart’s Bay is controversial because it does allow games to snowball out of control quickly, but this can turn into cockiness among teams that get ahead. It’s harder to lose a lead, but still possible, so don’t throw it all away over a flashy maneuver. It’s always much easier to pay Blackheart to do the work for you!
Find all of our other Heroes of the Storm map guides below:
Dragon Shire guide
Garden of Terror guide
Cursed Hollow guide
Sky Temple guide
Tomb of the Spider Queen guide
Battlefield of Eternity guide
Infernal Shrine guide
Towers of Doom guide
Most Popular


