How to stream on Twitch: a beginner's guide
How to stream on Twitch channel, which programs to use, scene setup, and more.

It's no surprise that more people want to know how to stream on Twitch. The platform continues to grow every year, and the most popular streamers can pull in tens of thousands of viewers every day, making big bucks in the process. It's not all about fame and fortune though. Playing games and maintaining conversations with the friendly folks that drop into Twitch Chat is a great way to socialize. Chances are, if you sink hours into streaming a game, you'll likely improve at it too.
Setting up a Twitch stream can feel daunting, especially when you're brand new to the platform. But don't worry, it's easier than ever to get set up. We're here to break down exactly how to get started, while offering some tips for building and maintaining an audience.
Get some streaming software

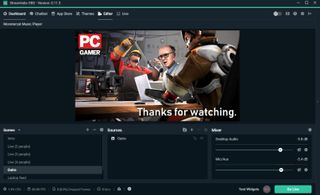
To start off, you need a program to stream with, and there isn’t a better free option than Streamlabs OBS. It’s free, saves all your graphics and layouts to the cloud, and can do nearly everything you are used to seeing on your favorite streams. It’s also extremely easy to use to setup and customize the look of your stream (more on that in a bit).
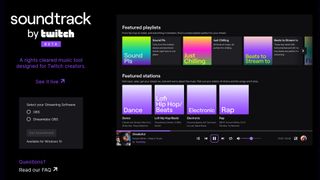
Twitch is also running a beta for its own proprietary streaming software called Twitch Studio. The jury's still out on how good it is, but you can sign up for beta access at the official website. From what we can tell, it looks slick and has some cool features that would naturally come from Twitch's own software, like chat integration. For the purposes of this guide, we'll be sticking to OBS.
Once you've downloaded OBS, head over to Twitch.tv.
There are other streaming platforms besides Twitch, but it has a few advantages over its competitors; It’s very straightforward and easy to use, it plays nicely with Streamlabs, and there are just simply more viewers on Twitch than elsewhere. The likelihood that someone browsing streams finds you is much higher where there are more people looking.
If you don’t already have one, make an account with Twitch and then go into the settings menu of OBS. Adjusting the stream’s preferences to fit your rig and internet connection is important, but until you have more experience streaming, it can feel a bit like punching in the dark. For now, it’s best to follow this guide to configure Streamlabs. These settings are a great baseline, and the blog post goes into detail about all the settings you'll need to adjust. Streamlabs also has the ability to automatically configure your options based on your internet speed and a quick hardware test. It won’t configure things perfectly, but it’s a great starting point.
PC Gamer Newsletter
Sign up to get the best content of the week, and great gaming deals, as picked by the editors.
Get a webcam
Above: James tests out his Logitech BRIO with a forbidden dance.
If you don't feel comfortable on camera this isn't a necessity, but it's worth investing in one, if you can. A huge part of streaming is the personality you bring to the game, not just the game being played. Viewers will be keen to interact with you, and having a webcam is a great way to do just that. It can be the reason people actually stick around to watch you but, if done poorly, it can also be the reason they leave.
You don’t necessarily need the best webcam as long as you set it up well. Good lighting can go a long way in improving the quality of your camera feed. Additionally, what’s going on in the background can be just as important as your face being clear. Don’t set up a camera where other people, something embarrassing, or something distracting might show up behind you. A wall or similarly static background will help your stream seem more professional. Some popular streamers even use a green screen to remove their background altogether. Consider trying out Nvidia's Broadcast Engine software as this can help you set up a virtual background without the need for a green screen.
Find a decent mic and good tunes

Your mic has a similar role to your webcam: it can make or break your stream, and is just as easy to get right as it is to get wrong. A stream with an echo is one of the most infuriating things to watch. If you are using a desk mic or the one built into your webcam then you NEED to wear headphones. There is nothing wrong with this type of mic on its own, and in a lot of cases desk mics are higher quality than headset mics, but they’ll pick up the game sound coming through your speakers and make for a very unpleasant viewing experience. If you plan on making a quality stream, a quality microphone is a necessity. You won’t need to spend your life savings on one either—some of the best streaming microphones plunge far below the $100 mark.
Another popular stream element is music. Playing music on your stream can be as simple as playing music on the same computer you are streaming from, but it's also possible to set up song requests for your viewers, using Twitch commands.
Unfortunately, this comes with a few pitfalls. Twitch has an automatic system that mutes recorded streams playing copyrighted music. This won’t affect the stream while you are live, but any VODs of your stream will be muted when an unauthorized song is played. In the past, Twitch Partners have also had to delete VODs containing copyrighted music.
A good alternative is Twitch’s royalty free music library, which currently has over 1500 songs to play, most readily available in Spotify playlists. The platform is also in the process of rolling out Twitch Soundtrack. This is supported by both OBS and Streamlabs OBS, offering licensed music that won't lead to any copyright claims. It's still currently in beta, but it looks like a promising solution to a problem that's worried content creators for years now.
Whatever your sound setup, balance between your microphone, music, and game audio is critical. You want to be able to hear all three elements at comfortable volumes. This takes some testing, but it's worth getting right. Streamlabs OBS offers the ability to record streams, so you can make adjustments to your setup and then watch it back to tweak it further.

Set the scene
At this point, you're just about ready to start streaming. All that’s left is putting all the pieces into place within Streamlabs OBS.
When you open Steamlabs, click the Editor tab. You should see an empty scene waiting there already. You’ll first want to add the game you’ll be streaming, so launch it now. Then, Alt-Tab back to Streamlabs and click on the '+' sign above the Sources list. Select Game Capture, then name the source and select the game you want to stream from the Application dropdown list and hit OK.
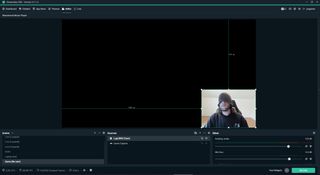
To add your webcam, make sure it’s plugged in, add another source, and select Video Capture Device. Name the source and select your webcam from the device dropdown list. If you want to adjust the resolution to something specific then you can do that here, otherwise hit OK as you’ll be able to resize the webcam in the scene viewer. Drag your sources around the stream until you're happy. When you click a source, a border will form around it signifying that you can click and drag from the corners or sides to resize any window. Hold Alt while clicking and dragging to crop a source.

Now it's time for overlays. An overlay is just an image or text superimposed over your stream. They can be as fancy as reskinning a game’s UI, or as simple as putting your twitter handle on screen. To add an overlay, add another source and select Image. Pay attention to the order in which your sources are listed. Sources at the top of the list will appear on top of sources below them, so if something disappears, the list just probably needs a quick shuffle.
If the image is a PNG the transparent parts will remain so, which is how many streamers add frames to their webcams, along with many other cool details.
Be sure to consider what game information your webcam and overlays are covering up. Even blocking small UI elements can be frustrating to viewers. If you are planning on streaming multiple games, you can make different scenes that vary slightly in webcam size and placement to ensure everything is always in the right spot. Scenes are also a great way to switch your stream up on the fly.
Making habits
At this point you should have a functional stream, but that doesn’t mean anyone is going to be watching. There are a lot of tricks to getting viewers, but one of the most important things is consistency. Setting good habits every time you stream is important to building an audience. Even if you just want to stream for fun and hitting the front page of Twitch isn’t your goal, there are certain things that can only help.
Tweet that you are streaming, tell your Facebook friends, yell it out your window.
This may sound simple, but tell people when you are streaming. It’s great to go live, but it’s better when people know you're live. Tweet that you are streaming, tell your Facebook friends, yell it out your window. You may not have many followers, but that’s because you just started, and the only way to get support is to make your presence known. Viewership can sometimes have a snowball effect, so even if your first five viewers are just your friends, the next five may not be...yet.
Another good practice is to turn on Panels on your Twitch page and write a short bio. Tell people who you are (without revealing anything confidential) and why they should bother to watch you. In the same vein, try to read and respond to chat as promptly as possible. Twitch has a slight delay, but people enjoy being heard and engaged with. Once again, even if you aren’t trying to become the top channel on Twitch, these habits will help you become a better streamer in the long term.
Tips and advanced tools

Last but not least, we have some extra features to help improve your stream. If you manage to get a following and find yourself with more people in chat than you’re used to, here are some helpful tips.
The more viewers you have in Twitch Chat, the quicker it can spiral out of control. So if you’re Twitch Chat starts to spam you with emotes or messages, you’ll want to enlist the help of some auto-moderators. Streamlabs OBS has built-in bot support, so consider giving it a try if you’re already using the program. Moobot is a simple chatbot that’s easy to get to grips with, as is Nightbot.
If you have a couple of helpful friends, you can also give them Moderator privileges in your Twitch streams to help keep things running smoothly.
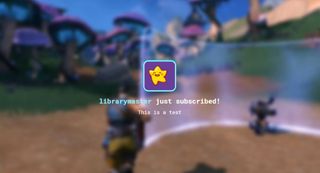
Additionally, if you ever watch a stream and wonder how they get those on-screen pop-ups each time they get a follower or subscriber, look no further. Even if you are just tracking followers, people like seeing their name on screen, and giving viewers tangible feedback of their interactions helps encourage more. We recommend—surprise—Streamlabs OBS! It has built-in support for widgets, from alert boxes, to bit jar, to spin wheels for contests. It also has an app store, where you can buy things like layouts, music libraries, and stat overlays. Considering it does just about everything you need to start streaming and then some, using it for trying out widgets is a no-brainer.
Twitch now also supports a feature called Squad Streaming, which lets up to four streamers collaborate on a single split-screen stream. It's perfect for streaming squad-based games like Fortnite or Apex Legends. Currently Squad Streaming is restricted only to Twitch Partners, but should be rolling out to Twitch Affiliates and eventually all streamers in the future.
Streaming can seem intimidating at first, but starting is the hardest part. The easiest way to get better is to just start doing it. Let yourself make mistakes and let other people know you are streaming. We also recommend cats. The audience loves a good stream cat.
James is stuck in an endless loop, playing the Dark Souls games on repeat until Elden Ring and Silksong set him free. He's a truffle pig for indie horror and weird FPS games too, seeking out games that actively hurt to play. Otherwise he's wandering Austin, identifying mushrooms and doodling grackles.
Most Popular


