The PCG guide: Get everything out of Rift's 1.3 event while you can - Phase 1

Rift's recent 1.3 update started the Waves of Madness, a multi-phase live event that will conclude with the opening of the Hammerknell raid instance in a couple weeks. The patch brought new companion pets and Item Sets , among other cosmetic and balance changes. But before the doors to the forsaken dwarven city open up, there's going to be several weeks of exclusive, limited-time content for you to play and earn unique rewards from. But once it's gone, it's gone forever. Luckily, we have you covered--we're putting together guides over the next few weeks to help you get the most out of each Phase's content while it's hear for the conquering.
What's Hammerknell?
Everything that takes place during the next few weeks is building towards the opening of Hammerknell, a dwarven city that's been eerily silent since the rifts emerged. That's not to say it's safe. Far from it--the city is forsaken, and filled with all manner of ghouls and horrors. When its doors open there will be a new a 20-man raid awaiting, with high-end loot and some the most challenging content to date. In other words, it's time to start getting geared, and the new daily quest content is a good place to start.
Breakdown of Phase 1's new, temporary daily quests
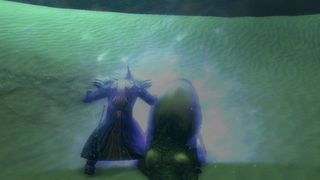
Just as was the case with previous Events, there will be daily quests that can be completed to earn the unique event currency. The quest givers in Waves of Madness, who share names in both factions' cities, can be found in Sanctum and Meridian. Completing their missions give Rune King's Seals, which can be spent to unlock different items.
Quest 1: War is Shell (levels 1-25), Shell Shock (26-39), Shell Comes to Telara (40+)
"I've received disturbing reports that the Dark Reaver population has boomed. If we don't kill their young, we will have an army of flesh-eaters crawling up our beaches. However, their willingness to breed could be a benefit to us. Dark Reaver Eggshells have amazing restorative properties. By collecting them, you'll help improve our stock of healing supplies." - Questgiver Tekro Barkuul
Objective: Collect 5 Dark Reaver Eggshells
Reward: Rune King's Seal (25), XP Varies
The Coconut Monkey-approved strategy:
PC Gamer Newsletter
Sign up to get the best content of the week, and great gaming deals, as picked by the editors.
- Head out of the city and venture into the water. Depending on your level, the egg sacs will be in different places, with the lowest-level ones being near the shore, and the highest being in contested areas. Take a deep breath and swim down to the bottom and click on each sac to retrieve their shelly insides.
- Once you open the sac, there's a good chance that a Dark Reaver Mother will come calling, none too happy that you're messing with her progeny. At this point you have two options depending on your current level: fight or run.
- If you run: Be careful to avoid the mobs on the shore (it really helps to have a pet out that can hold aggro while you make your getaway). Wait until the coast is clear, and repeat until you have your five shells.
- If you fight: Mamma Reaver doesn't have any special abilities, so just take her down and continue harvesting the sweet, sweet eggshells until you have them all.
- Return back to Barkuul for your rewards, and then look in the mirror and think about the monster you've become.
Quest 2: Swift Action (all levels)
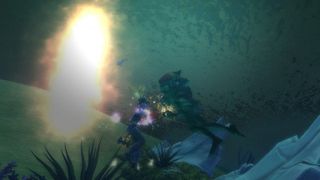
"The Abyssal are obtaining reinforcements from the Plane of Water by way of several planar tears hidden beneath the seas and lakes of Telara. Use this Warped Coral Focus. It will allow you to lure the creature on the other side of the tear into Telara. These creatures are responsible for maintaining the tears. By slaying them, you'll help to slow their buildup of forces." - Questgiver Arnalt Prell
Objective: Kill 3 Tidelord Overseers
Reward: Rune King's Seal (25), 1890 XP
The Coconut Monkey-approved strategy:
- First, you need to find planar tears. Head to the coast and swim underwater.
- Approach them, and use the Warped Coral Focus from your inventory (it will also show up in the Quest Tracker) when you get close.
- Doing so will draw out some beasties known as Tidelord Overseers. They don't put up much of a fight as long as you're in the 14-16 level range, but be careful not to pull aggro from other mobs in the area--that'll definitely ruin your day. Kill them; they go down quickly.
- Return back to Prell for your reward, and spend some gold for top-notch dry cleaning.
Quest 3: Something Fishy (all levels)
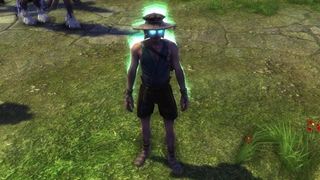
"Can you smell it? Smells like TREACHERY!I know there must be Abyssal slithering about, but they can change their appearance and make themselves look like regular folk. But douse them with a little sea water, and their true scales come out." - Questgiver Oblo Crustypot
Objective: Reveal and kill 7 Abyssal Infiltrators
Reward: Rune King's Seal (25)
The Coconut Monkey-approved strategy:
- You actually don't even need to leave the capital cities for this one, but you should still mount up--it makes it go faster.
- Cruise around looking for suspicious NPCs. They can be anywhere, so if you can't find one wandering around outdoors check the crafting area. They glow, and have names like Soggy, Dampened, Dripping, or Drenched Villager, so they should stick out to you right away.
- Once you see one, get close and use Oblo's bucket to douse them, revealing their true form.
- Vanquish the slimy Abyssal Infiltrator. They seriously only take like two hits to kill, maybe three if you're a lower-level. Rinse, and repeat seven times.
- Return to Olbo Crustypot, who does, in fact, have the absolute silliest name in all of Rift.
Quest 4: Bracing the Ward (all levels)
"If the Prophet of Woe is correct, the Ward Is under unusual strain from Akylios' forces. We'll need to strengthen the wardstones. Fortunately, you have the power to do just that! Find a wardstone that's near your level of power, and use your Augmented Wardstone ability to brace the wardstone. If necessary, take back an enemy foothold to restore a wardstone first.” – Questgiver Tekro Burkuul (Note: If you don't yet have the Augment Wardstone ability, you'll be given a quest to get that instead, which will send you to the correct person to purchase it from.)
Objective: Use Ascended Power: Augment Wardstone on a wardstone within five levels of your level
Reward: Rune King's Seals (25)
The Coconut Monkey-approved strategy:
- Head through the porticulum to the highest-level area you can go. Usually, it's the place you've most recently completed quests.
- Make sure you have the Augment Wardstone ability on your skill bar, and head to the nearest wardstone--it will be in the quest hub.
- Use the Augment Wardstone ability on the wardstone and sleep easier knowing you've made the world safer for a few more miliseconds.
- Return to Tekro for your reward. If he asks, just say it was really difficult.
Phase 1's story quests
While anyone can do the daily quests, Phase 1 also begins a chain of story quests available for max-level players. Here are the details:
Quest: A Storm Brewing (Level 50)
"I've heard rumors that the Abyssal have been slithering around Runic Descent. I don't like the thought of them desecrating the home of my forefathers. With numerous reports of attacks on our people, the Runeguard are stretched thin. We could certainly use your aid in this matter." – Questgiver Dulan Lighthammer
Objective: Use the Crystal of Remembrance within Runic Descent
Reward: Rune King's Seals (40), XP
The Coconut Monkey-approved strategy:
- This quest is only available to max-level players, so make sure you're geared up and have four friends ready to dive into the regular version of the Runic Descent instance.
- Travel to Runic Descent in the Moonshade Highlands (6234, 1357).
- Use the Crystal of Remembrance from your inventory (it will also show up in the Quest Tracker) when you arrive at the area marked on your map to discover the reason why the Abyssal have been killing Dwarves all over Telara.
Quest: Heir of Hammerknell (Level 50)
“I, General Stanig, sealed Hammerknell's doors when the shade infected our home. If you are seeing this message, I have failed to protect the outside world from the horrors within. Now, there is only one hope. Locate the Heir of Hammerknell, as they are the only one capable of wielding the rune magic of our ancestors.
There are those who would twist this power, so to protect the chosen one, I left clues to their identity scattered throughout Telara. Find these Rune Tablets and protect the Heir so they can reopen the doors of Hammerknell and defeat the evil which I could not.
I pray that whoever receives this message has the mettle to undertake this task, for the fate of the world now rests on their shoulders.” – Questgiver General Stanig's ghost
Objective: Travel to different areas in Telara to find Rune Tablets.
Rewards: Rune King Seals (40), Lucky Coin
The Coconut Monkey-approved strategy:
- You'll have to fight your way through the whole dungeon for this one. Upon defeating the final boss in Runic Descent, use the Crystal of Remembrance, causing General Stanig's ghost to appear and offer you this quest.
- Add the Gloomy Rune Clue he gives you to your artifact collection, which will get you started on your rune tablet scavenger hunt.
- Get ready for a magical adventure all over Telara! Any by magical, I mean, well, a lot of traveling. The Rune Tablets are scattered all over the place. Here are their locations:
- Gloomy Rune Tablet - In Gloamwood at the back of the cave found in the bottom of Millrush Pond.
- Frozen Rune Tablet - In Iron Pine Peak visit the Chancel of Labors and take the tablet from the wall in the basement.
- Mathosian Rune Tablet – In Stillmoor the tablet is in a chest in Caer Kholum.
- Scarred Rune Tablet - In Scarwood Reach the tablet is in the Lord's Hall.
- Harrow Rune Tablet – Visit the Harrow Crypt near Granite falls to find the Tabblet. Harrow's Crypt is in Stonefield.
- Drought Rune Tablet – In the Droughtlands. Go to Mordant Knoll and find the Tablet in an alcove behind Queen Maelign.
- Gloomy Rune Tablet - In Gloamwood at the back of the cave found in the bottom of Millrush Pond.
- Visit Scotty Malm, who somehow is in both Sanctum and Meridian at the same time (dun dun dun!) to turn in the quest.
Fancy things to find and spend all those Rune King's Seals on!
Completing these quests will earn you Rune King's Seals, which can be spent on new loot from the vendor. After completing the three daily quests just once you'll have enough to buy the Lesser Barnacle Encrusted Choker, Lesser Shimmering Deepstone essence, or a few vials of Abyssal Water you can use to enchant your weapon. Don't spend them all in one place, though--with each phase, more new loot will become available. Some are cosmetic, some give stats, and others are downright absurd. Here's a sampling:
Tricorne of the Drowned Thief (Rare loot)

Drink up me hearties yo ho! The Azure Blade once plundered the coasts of Telara for fun and for profit. Then they made the career ending decision to join the Abyssal cult and have since been systematically hunted down by the Ascended of Tealra. Now, you can wear their hats!
Puffy Dwarven Toque (500 Rune King's Seals)

The first hat of this style was designed to signify the wearer as the Runeking's favorite among the chefs of Hammerknell. The style has since become a popular and traditional toque among the dwarves, and with good reason--this hat is absolutely awesome and absurd and we love it.
Whelp of Murdantix Mount (Rare loot)
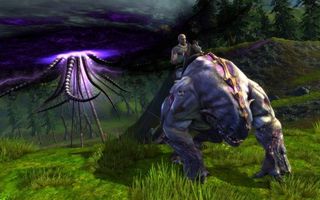
Murdantix may hide within Hammerknell, but his whelps have been captured and tamed for the convenient conveyance of the Ascended of Telara. They're fantastic if you want your opponents to cry and run away when they see you riding towards them*.
*Note: As far as we know, the mount doesn't cause people to run crying when they see it. At least not every time.
Most Popular


