Keyboards are often one of the dirtiest parts of your whole PC set up. They are front and centre for all kinds of use, and often fall victim to the most spills. Thanks to their very nature keyboards are filled with canyons and crevice's just waiting to collect all the dust, hair, and crumbs they possibly can.
But the good news is keyboards are really easy to clean, especially if no liquid spills have been involved. Giving your keyboard a nice little blow out now and then can help keep the keys moving freely for longer and is a super simple act of general maintenance. If you've done a bit of a whoopsie that needs immediate attention, at least give our cleaning guide a go before you go and spend good money on a new board. Before you go looking at the next best gaming keyboard of your dreams, give old faithful a bit of a chance with some of our restoration tips.
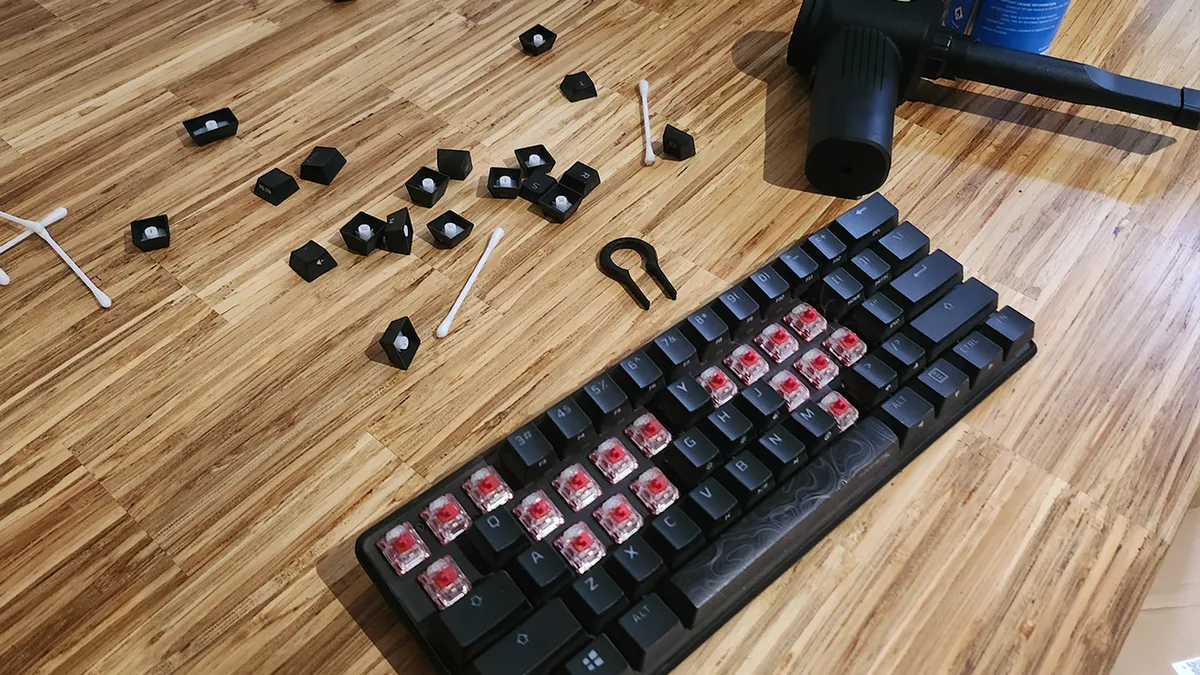
Get your tools
Any good keyboard cleanout should start with a quick tool check. You don't need much to get that board spic and span, but here are a few inexpensive items it's good to have on hand before you get started.

- Cotton tips - You can buy a box of eighty million of these at your convenient local store.
- Compressed Air - A can of compressed air will last you longer than you think, and is great for quick controlled bursts that can make short work of hair, dust, and crums.
- A mini vacuum/blower - If you're sick of buying compressed air you can get one of these pretty cheap. They're not as direct or as powerful but they'll do the job and you can just recharge it instead of needing a new can.
- A lint free cloth - Cotton is often the best here. Keep it in a safe dust free space for best results.
- Isopropyl alcohol - If you're wanting to remove stains, then you're going to want some of this to do it safely.
- Keycap puller - You can just use a knife, but these are cheap and make the job much easier.
How to clean your keyboard
1. Getting rid of dust and dirt — In between those keys you're likely to find a bunch of general dirt. It's going to be made up of dead skin, dust, dog hair, and whatever else is drifting around your home. You can start by making sure the board is off and unplugged and giving it a good shake. This can remove a lot of the main offenders, especially if your keys are a little roomy.
2. Use a blower or vacuum — If it's worse, thankfully all this should need is a nice spin with a blowing tool like compressed air, or even a vacuum with a brush head to completely clean out. Use it in the same direction along the board to make sure you aren't just blowing dust back and forth. It can help to aim between the keys where possible.

3. Remove the keys — For the worst offenders, you may even need to take the keys off to really get in all the nooks and crannies. Most gaming keyboards now days support removable keycaps, but it's still a good idea to check before you remove any keys for that ultra deep clean. Make sure to take a picture of your board before you start so you have a reference for putting the keys back when you're done.

4. Dealing with liquids and caked on mess — If you haven't already removed your keys and you can, it's time to get plucking, but as usual it's good to make sure your board is turned off and disconnected from power first. Having the keys gone should give you a much clearer view of your board so you can really see where your dirty problem areas are.
5. Dry scrub — Go in with a dry cotton swab or something similar first, sometimes you can get rid of the problem just with a light but direct scrub. If not, you're going to want to introduce some isopropyl.
6. Using Isopropyl —Take a lint free cloth and dip it into some isopropyl alcohol/acetone. Line the cloth up with the gap between your keys and rub it through them a few times, always moving in the same direction. If you have enough room between key caps you can use the same process with a cotton swab or similar.
7. Wash the keys —If you've felt the need to remove your key caps, and they don't have any electronic parts feel free to give them a good rinse in water. Just make sure they're fully dried off afterwards.
Once your cleaning is complete, make sure everything is completely dry before plugging the keyboard back in. When you're ready, connect it back up to your PC and test that each of the keys works as intended. If not, pop the keycap off to make sure that you didn't leave anything under it like a piece of cotton swab during surgery. Hopefully this will have your keyboard back to good health