Ultimate BIOS Guide: Every Setting Decrypted and Explained!
Power users routinely punch into the BIOS in order to fine tune their system, but it can be an intimidating place to go exploring if you've never before burrowed beneath the surface. And just like in real life, poking around in unknown places can be a dangerous affair if you don't know what you're doing or where you're going. On the other hand, once you understand the inner workings of your PC's control center, a whole world of overclocking and troubleshooting suddenly opens up. But what exactly is the BIOS?
Every modern motherboard comes with an embedded Flash EEPROM module, otherwise known as the BIOS chip. Short for Basic Input Out System, this is the first bit of code executed when you boot your PC. The BIOS stores all kinds of essential information about your system, such as your CPU's clockspeed, the size and type of RAM you're running, the boot order of your media, what onboard devices are present, and much, much more. An improperly configured BIOS can prevent Windows (or Linux) from loading, while a finely tuned BIOS has the potential to significantly improve performance over that of a similarly spec'd machine.
Whatever your goal is, this is your go-to guide for everything you've ever wanted to know about the BIOS. We cover every setting -- even the obscure ones -- so you'll never feel lost or out of your element, no matter what motherboard you're rocking under the hood.
Check out our Essential BIOS Tweaking Guide here
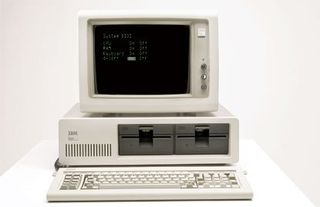
How do I Get In?
Whether from a cold boot or rebooting, getting into your BIOS is as easy as hitting the DEL key as soon as your system starts to POST. You might even see a Splash screen instructing you to hit DEL, but this isn't always the case. If mashing the DEL key doesn't do the trick (some OEM setups, notebooks, and older PCs use a different key), try punching F1, F10, or the ESC key. For really old PCs, you might even need to hit a combination of keystrokes, in which case your best bet is to consult your user manual or the modern day oracle known as Google for the correct sequence.
Main BIOS Menu
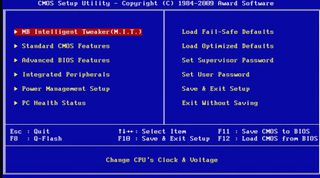
The overall layout will vary depending on your specific motherboard model and BIOS type, but every modern BIOS shares the same basic settings. We're going to cover those now while using a Gigabyte X58 as our test platform.
Standard CMOS Features
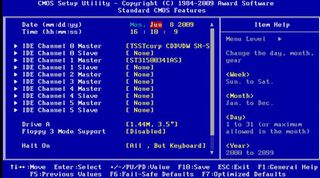
Exactly as the name implies, this is where the standard settings are located, including the date, time, and drive configuration.
Date and Time: You shouldn't need to configure the date and time more than once, but if it keeps getting knocked out of whack, it may be time to replace the CMOS battery. You can try leaving your PC on for an extended period of time to recharge the battery, but it's cheap enough to replace outright and a new one should last for years. Check your motherboard manual for the type of battery it uses, which will probably be a CR2032 .
PC Gamer Newsletter
Sign up to get the best content of the week, and great gaming deals, as picked by the editors.
IDE Channels: Here is where you'll find what IDE drives you have connected to your PC. These are the ones that use those old school fat ribbon cables of yesteryear and require multiple drives on the same channel be configured as 'Master' and 'Slave.' Your drives should show up automatically, but if not, highlight the appropriate entry and hit the Enter key, which brings up another submenu.
- IDE HDD Auto-Detection: Use this to auto-detect a newly connected hard drive. - Access Mode: Also known as the Translation Method, this setting relays the physical characteristics of your IDE drive to your system and how to define the disk size.
If you're still not seeing your drive(s) show up, check that the jumper on the back has been properly configured and that you remembered to plug in a Molex power connector.
SATA Channels: These are your SATA drives, though your motherboard may still label them as IDE. Because each SATA drive operates on its own channel, they do not contain 'Master' and 'Slave' settings. On a related note, only connect ONE power source, even if it has inputs for both a 4-pin Molex and SATA power connectors. Plugging these both in can ruin your HDD.
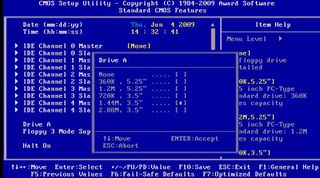
Drive A and B: Refers to the type (if any) of floppy drive you have installed, or plan to install. The most common today is 1.44M, 3.5 in. You can also set this to Disabled if you're not planning to rock out with your floppy out.
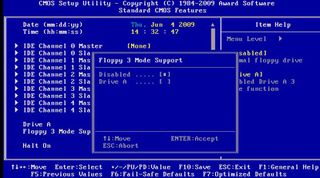
Floppy 3 Mode Support: Designates a special type of floppy drive that supports three different types of floppies. These were mainly used in Japan and never gained any major footing in the U.S.
Video: Some motherboards don't even include this setting anymore, but this allows you to designate what type of videocard you have installed. Unless you have a specialized configuration, this should read EGA/VGA' Set this to your primary videocard type, and not the secondary (if one is installed).
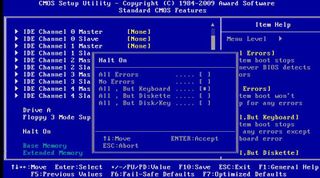
Halt On: Configure this setting to tell your BIOS which errors to ignore during POST.
Advanced BIOS Features
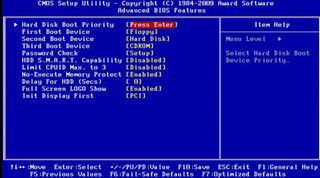
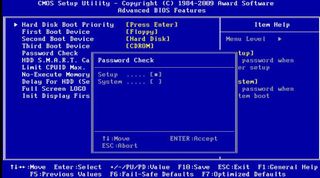
In the Advanced menu, you'll begin to scratch beneath the surface and configure how various parts of your system operate. This might also be where you set the boot priority, though some motherboards -- like those Asus offers -- dedicate a separate submenu to this task.
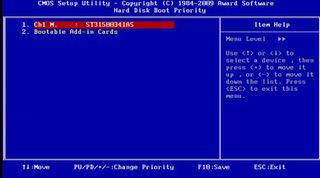
Hard Disk Priority: When you have multiple hard drives installed, this setting tells your BIOS which order it should attempt to boot them. This can be handy for dual-booting OSes, with each OS -- like Windows and Linux -- installed on separate drives.
First and Subsequent Boot Device: This is where you'll determine what order your system should attempt to boot from. If installing Windows, for example, you'll want to designate your CD/DVD drive as the first boot device before your hard drive.
Most Popular


