Mass Effect: Andromeda multiplayer guide
How to handle each enemy type and keep your team on top.
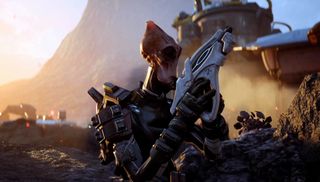
For the stalwart Apex forces, Mass Effect: Andromeda's new galaxy is a spiral-shaped suburb full of Kett to kick off their new lawn. Andromeda’s multiplayer elaborates on Mass Effect 3's wave-based co-op format with jetpack-fueled mobility and more freeform ability use. Enemies hit harder and seek you out more aggressively as a result, but if you achieve extraction, you’ll reap some nice rewards for both your Apex personnel and Ryder’s journey.
This multiplayer guide will help you get started with the fundamentals on survival and an analysis of each enemy type. To dig deeper, check out our Mass Effect: Andromeda multiplayer build guide, too.
General tips
Stick to your class strengths. Some kits, such as the Engineer or Sentinel, excel at locking down areas or hunkering with bolstered defenses. Others take advantage of Andromeda’s heightened mobility—Vanguards, Infiltrators, and other similarly movement-heavy classes mesh exceptionally well with rapid jet-boosts to dive behind cover or dash to a flank. Pick the class that pairs the best with your playstyle, and your suite of abilities will greatly enhance your combat effectiveness.
Shoulder-swap your view as needed. With a tap of the default Alt key, your viewing angle behind your character switches between their left or right shoulder. This is crucial for orienting yourself correctly if you’re peeking around a corner, tracking enemy movements behind cover, or funneling a target in a certain direction.
Use the “right-hand advantage” to shoot safely around corners. Here’s how it works: sidle close to the corner of a leftward turn. Angle your crosshair so it covers the area beyond the turn while your character sits behind cover. It looks slightly goofy, but your shots will still land where you're aiming—bullets have a hitscan effect instead of exiting from your gun’s barrel. This works on a rightward corner, as well, but not as reliably. (Watch this clip from ME3 for a visual example.)
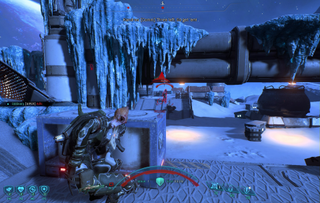
Bind the “Last Used Weapon” command near your movement keys for faster weapon switch. “Q” is the traditional quick-switch key cemented from shooters past, but any key you can comfortably strike will serve as a trusty alternative to the possibly slippery mouse wheel during tense moments.
Keep moving—especially up. You'll probably fail if you or one of your teammates shoves themselves in a corner and refuses to budge. The enemies in Andromeda’s multiplayer are quite aggressive and will constantly attempt to flank and blitz your area. Constant repositioning—don’t forget to jet upwards atop rooftops and elevated walkways for the height advantage—is key for preventing overwhelming situations, particularly in the challenging Silver and Gold difficulties.
PC Gamer Newsletter
Sign up to get the best content of the week, and great gaming deals, as picked by the editors.
Your equipment weight affects ability cooldown rate. Your abilities begin at a 100% rate, meaning they’ll refresh at their base speed with no penalties. As you load up more armaments and gear, you’ll weigh down your character and eat into your cooldown percentage. At a 50% rate, for example, your abilities would take twice as long to refresh. Gauge how much firepower you’ll need in exchange for power viability—power-hungry classes such as the Vanguard or Adept might have to carry a single weapon, while brawnier kits such as the Soldier can typically carry two weapons at no penalty. Higher-rank weapons and attachments found in supply boxes can help offset weight penalties.
Some abilities can be charged for an enhanced effect. Simply hold down the ability’s key for a few seconds to amplify its output. Check the tooltips for your powers to see if any sport a charge alt-fire and their effects, such as Overload’s multi-target chain attack.
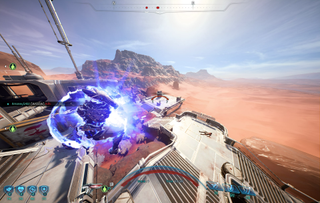
Keep consumables stocked. Medkits and revive kits have self-explanatory importance, but don't forget about the Cobra RPG’s emergency decimation, handy for clearing a room with a single click.
Get familiar with abilities that can prime and detonate damage combos. Combos occur when a primer and detonator power fire off in quick succession in the same area, causing immense burst damage. Look for either the plunger or explosion symbol in a power’s icon to determine if it helps with combos (or just read our class guide for a complete mapping of each combo ability).
Prioritize weaker enemies first before focusing on stronger cohorts. They’re hard to miss. Whether floating with biotic power, shaking the ground with metallic stomps, or barely fitting through a doorway from sheer size, these boss-style foes can endure plenty of pain from either deep shields or armor (or even both), so focus first on culling the herd of accompanying weaker enemies. When the big baddie is all who’s left standing, you won’t have any minor annoyances getting in the way of your team’s concentration.
Kett enemies
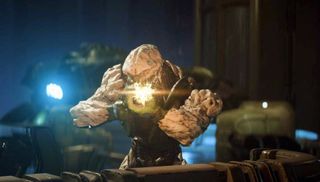
Fiends and Ascendants are tough spawns in later waves especially if they box you inside enclosed areas. They can both eliminate you or a squad member in a single hit if they get too close, making it tough for teammates to revive you. Damage the former’s orb first to bring down its shield, and target the latter’s gill-like vents behind its arms or on his back to deal bonus damage.
The bone-like plate jutting out from the Wraith’s head can be blown off to expose the soft flesh beneath. They’ll go down quickly afterwards.
Anointed are the Kett’s LMG-wielding bruisers who, like certain other Kett, can phase in and out of visibility for a short period. Seek cover or bait them around corners (try the right-hand advantage trick noted above) to single them out from packs.
Remnant enemies
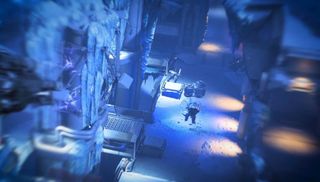
The Nullifier will plop down a shield in front of its face and fire special beams that pass through cover. You can still damage his red optic peeking above the shield for extra damage. If you get close, it’ll drop its shield and attempt to swat you away, leaving it exposed to staggering effects.
A towering Destroyer often appears in later Remnant waves, and it’s a tough challenge for fledgling groups to combat its deep shields. Both of the Destroyer’s top-mounted turrets are significantly weaker than its more armored core, and taking them out will deal damage to the entire unit. Biotics are particularly effective at chunking away the Destroyer’s shields; if you lack space magic powers, send shots into the turrets instead.
The annoying Breacher lacks ranged firepower but will try to fly close and block your view by buzzing into your face. If it manages to grab you, it’ll pin you in place and deal steady damage until you tap a key to break away. If you’re busy with other targets and spot a Breacher closing in, jet-dodge backwards to give some distance and plug it fast.
Outlaw enemies
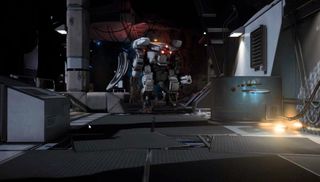
Target the hulking Hydra’s red-colored optical cluster on its front first. Once they’re destroyed, circle to its back and shoot the red electronics jutting out near its head.
Salarian Agents can pop a Tactical Cloak to evade your crosshairs and throw out a decoy hologram while attempting to flank around you. Try closing the distance and throwing out a few punches to conserve ammo and test if your target’s the real thing.
Berserkers will gladly attempt charging in to deliver heavy melee strikes; failing that, he’ll hang close by and pelt you with shotgun blasts. He can withstand significant damage before succumbing, but be particularly aware for his blood rage when at low health; that’s your cue to throw out a stun effect or two to keep him away.
Finally, you can spot the Angaran Saboteurs by their glowing gauntlets cradling a shotgun that deals incendiary or cryo damage. He boasts both armor and shields, making him a tough nail standing out from the softer Outlaw bandits. If left uninterrupted, he’ll drain your shields with a slightly longer animation than similar class abilities, but it also exposes him to attack while he stands in place to cast.
Omri Petitte is a former PC Gamer associate editor and long-time freelance writer covering news and reviews. If you spot his name, it probably means you're reading about some kind of first-person shooter. Why yes, he would like to talk to you about Battlefield. Do you have a few days?
Most Popular


